MyDriveWorks - Tech Tips
Learn how powerful your Specification Flow can be. Control Who has access to a Specification as well as What, When and Where Tasks are performed.
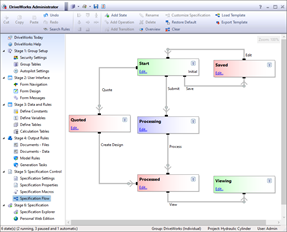
The Specification Flow task provides the ability to customize the behavior of specifications created by running a project. Multiple steps can be configured, and the actions that are taken at each customized.
Specification Flow gives complete control over the specification process.
It allows the creation of the navigation buttons that appear on the user forms.
You can choose what will be created from a specification and when it will happen.
Furthermore you decide which Users or Teams have permission to perform actions on a specification.
Beyond simply customizing the built-in Specification Flow, it is possible to completely replace it with a custom one of your own design to gain complete control over the specification process.
At the top of the Specification Flow designer, there is a list of warnings (if there aren't any then this won't be visible). Many of these warnings will prevent you from being able to run a project.
The default Specification Flow can be customized to suit your own requirements. This is useful if changing the name of the Transitions or Operations is all that is required. Anything more than this and we recommend to Clear the default Specification Flow.
The default specification contains some intricacies with the release transitions:
There is a condition that will check if this setting has been applied. Please see Setting: Release To Autopilot for more information.
DriveWorks Autopilot will generate models, if it is running, regardless of the method of release.
Releasing specifications to DriveWorks Autopilot is recommended when using DriveWorks Live for performance.
Please see How To: Modify Specification Flow for more information.
By default, the Specification Flow for a project is not customized and cannot be changed. A warning message indicating this will appear at the top of the design area, which reads:
Warning: This Specification Flow is not customized and can not be edited
To customize the Specification Flow, click the  button on the command bar.
To add a state to the Specification Flow
| Step 1 |  | Click the Add State button on the command bar. |
|---|---|---|
| Step 2 | 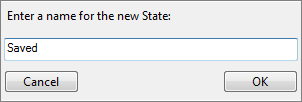 | Give the new state a name and click OK or hit Return on the keyboard to create it. |
The first state added to a blank Specification Flow will automatically be set to a Running and Initial State.
The Initial State has an Initial label in the bottom right corner.

Every Specification Flow must have one Initial State.
This tells DriveWorks which state a specification enters when a new specification is started.
To Change the Initial State
| Step 1 | 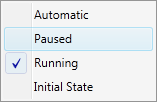 | Right click on a running State that is to be set as the Initial State. This will open the State Type dialog. |
|---|---|---|
| Step 2 | 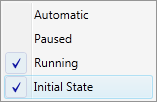 | Click Initial State. The state has now been set to be the initial state |
Once a State has been added to the design area it's type can be set.
There are three types of states:


Embedded Child Specifications
Automatic states will not work on embedded child specifications, as Autopilot can not see the projects, but the topmost specification can still be put in an automatic state and released which will cause it and all of its children to release.
See Project Settings for more information.
To Change the Type of State
| Step 1 |  | Right click on the State that is to have its type changed. This will open the State Type dialog. Select one of the state types:
|
|---|
To Open the State Editor
The state editor enables an administrator to customize the tasks that are run when operations and transitions are started, or when events occur.
| Step 1 |  | Click the Edit... link at the bottom of the state to edit. |
|---|
To Create a new Operation on a State
| Step 1 |  | Select the state on which to create the new operation. |
|---|---|---|
| Step 2 |  | Click the Add Operation button on the command bar. |
| Step 3 | 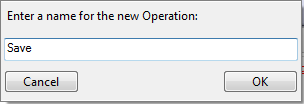 | Give the new operation a name and click OK or hit Return on the keyboard to create it. |
To Create a new Transition from one State to Another
To Change the Target of a Transition
If the transition already has a target:
If the target does not already have a target state:
To Rename a State
To Delete a State
To See an Overview of a Large Specification Flow
If a Specification Flow becomes so large that it cannot be seen without scrolling, a preview can be turned on by clicking on the Overview button on the command bar.
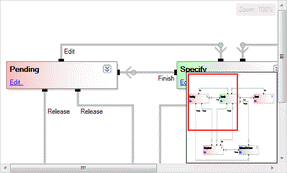
You can click and drag the red rectangle in the overview to navigate the Specification Flow.
To modify or clear the Default Specification Flow
To Reset the Specification Flow to the Default
To completely clear the existing Specification Flow
This operation can be undone.
To align two or more states, either box select (by click-dragging the Specification Flow design surface), or control-select each state you wish to align, and then press the relevant alignment button.
| Icon | Alignment | Description |
|---|---|---|
 | Align Left | Aligns all selected states to the left most position |
 | Align Top | Aligns all selected states to the top most position |
 | Equalize Vertical Spacing | Evenly distributes three or more selected states between the top most and bottom most selections |
 | Align Center | Aligns all selected states to the center (vertically) of the last selected state |
 | Align Middle | Aligns all selected states to the middle (horizontally) of the last selected state |
 | Equalize Horizontal Spacing | Evenly distributes three or more selected states between the left most and right most selections |
 | Align Right | Aligns all selected states to the right most position |
 | Align Bottom | Aligns all selected states to the bottom most position |
The main window can be zoomed in and out by holding the control key on your keyboard, and scroll using the wheel on your mouse.
To reset the zoom to 100% at any time, double click the zoom level box at the top right of the main window.
The zoom level is hidden when at 100%
The transition connection line is placed onto the target state automatically by DriveWorks.
If a target state has been selected incorrectly it can be moved to a different state.
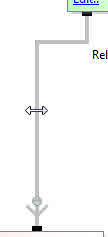
If the position of the connector on the source or target state is not to your liking it can be repositioned.
If the connection line or lines interfere with other connection lines they can also be moved.

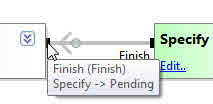
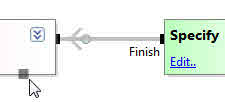
To be able to work with transitions or operations in a state, you first need to expand the state by using the Expand/Collapse box at the top right of the state, this will expand the state so that it looks like the following:
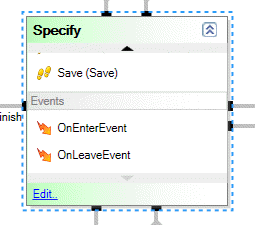
You can then use the arrows at the top and bottom to scroll the operations, transitions, and events in the state.
Operations and Transitions have both a name and a title. Two operations or transitions can have the same title but must have different names, this is useful in cases where you want the end-user to see the same action, but you want to do slightly different things, perhaps based on the team they belong to, or settings in DriveWorks.
For example, in the default Specification Flow, there are two Release transitions ReleaseLocal and ReleaseToAutopilot which are both titled Release, but only one is visible to the end-user depending on the settings in DriveWorks.
DriveWorks has some preloaded Specification Flow Templates that can be used for your projects.
Additionally your own customized Specification Flows can be exported and loaded into other projects.
Advanced Child Specification Flow Template
Creates a new advanced Child Specification Flow with separate Model and Document Release States.
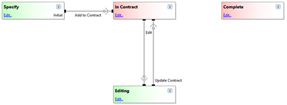
Advanced Specification Flow with Approval Template
Creates a new advanced Specification Flow with an approval loop before creating designs.
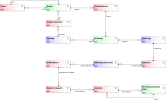
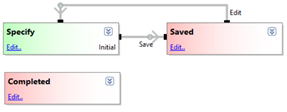
Autopilot Child Specification Flow Template
Creates a new Specification Flow designed for Child Specifications when Autopilot is used for processing.
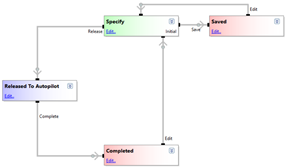
Autopilot Parent Specification Flow Template
Creates a new Specification Flow designed for Parent Specifications when Autopilot is used for processing.
Basic Child Specification Flow Template
Creates a basic Child Specification Flow with Model Release on Transition of the Child Specification.

Basic Specification Flow Template
Creates a basic Specification Flow with no Approval Process.

Basic Specification Flow with Automatic State Template
Creates a basic Specification Flow with an Automatic State for Autopilot to generate the Released Models.

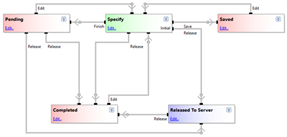
Classic Specification Flow Default Template
Creates the Classic Specification Flow Default for compatibility with old implementations.
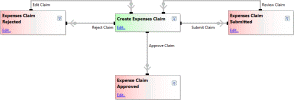
Expense Claim Specification Flow Template
Creates a Specification Flow for approving or rejecting expenses claims.
Holiday Request Specification Flow Template
Creates a Specification Flow for approving or rejecting holiday requests.

Quotation with Approval Specification Flow Template
Creates a new Specification Flow ideal for a Quote with an Approval Loop.
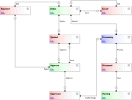
CPQ Custom Item Flow
This Specification Flow Template can be used to add a Specification Flow to a configurator that you want to use as a Custom Product inside the DriveWorks CPQ DriveApp.
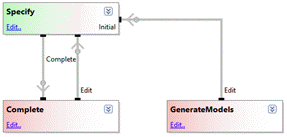
For information about exporting a customized Specification Flow as a template please see How To: Create And Install A Specification Flow Template.
Learn how powerful your Specification Flow can be. Control Who has access to a Specification as well as What, When and Where Tasks are performed.
View all available MyDriveWorks Tech Tips.
The first state a specification enters when a new specification has been started.
Indicates the user forms will be loaded into the specification window or browser for the users to enter data onto.