Integration Module
The Integration Module supports integrating DriveWorks Live into external web sites, for example Content Management Systems, Enterprise Resource Planning and Customer Relationship Management systems.
The Integration Module reads parameters passed to it as a query string which can be passed in either a link, or by embedding DriveWorks Live in a Frame or iFrame.
This module is used on the default /Integration web page (see Editing the Integration Module below), and contains nothing to display to the user. Only when an Administrator enters edit mode on this page will the settings screen become available to edit.
Usage
Typically the Integration Module is used when running DriveWorks Live within an Inline Frame. See Embedding DriveWorks Live into your Website for more information.
The Integration Module is used to create new Specifications or edit existing Specifications through a URL.
To use this module, the query string of your page URL must include particular parameters depending on the intended action to perform. Multiple actions can be performed at once by combining the query parameters using the & symbol.
| Parameter | Description |
|---|
| User={username} | This will log a particular user in. The module setting "Requires Exact User" ensures the username set in this module is logged on, logging off any previously logged in user. See Editing the Integration Module below for more information.
Note When logging in as a particular User, that is password protected, for security reasons a password cannot be defined in the URL. To overcome this you must: - Give all users a blank password
Or - Give all users the same password as set in the default password setting. See Editing the Integration Module below for more information.
|
| Run={ProjectName} | This will run a Project. |
| Specification={SpecificationName} | This will display the details of the existing Specification. |
| Specification={SpecificationName}&Operation={OperationName} | This will perform an Operation on a particular Specification. The Operation must be a valid Operation, with all conditions met for the Specification, for this to run. |
| Specification={SpecificationName}&Transition={TransitionName} | This will perform a Transition on a particular Specification. The Transition must be a valid Transition, with all conditions met for the Specification, for this to run. |
Named Pairs
It is also possible for the URL to pass values into Constants and Form Controls in the Specification.
To do this each Constant or Form Control that is to receive the value must be prefixed with the string Parameter.
 Image showing a Constant prefixed with the string Parameter in DriveWorks Administrator.
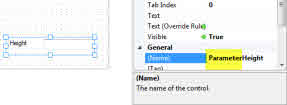 Image showing a Form Control prefixed with the string Parameter in DriveWorks Administrator.
When the Constants and Controls have been applied in DriveWorks Administrator the query string of your page URL must include these parameters without the Parameter prefix.
| Constant or Control Name | Parameter | Description |
|---|
| ParameterLength | Length=1234 | This will pass the value 1234 into the Constant or Control named ParameterLength in the Project being run. |
| ParameterHeight | Height=963 | This will pass the value 963 into the Constant or Control named ParameterHeight in the Project being run. |
| ParameterLength and ParameterHeight | Length=1234&Height=963 | This will pass the value 1234 into the Constant or Control named ParameterLength and the value 963 into the Constant or Control named ParameterHeight in the Project being run. |
If a Constant and Control have the same name, for example ParameterWidth DriveWorks will give priority to the Constant.
Example URL
The table below gives example URLs that can be passed into DriveWorks Live.
| URL | Description |
|---|
| http://www.mydomain.com/Integration?Run=MyProject | This URL will go to www.mydomain.com (the DriveWorks Live URL), and run a new Specification based on the Project name MyProject. |
| http://www.mydomain.com/Integration?Specification=IS81951 | This URL will go to www.mydomain.com (the DriveWorks Live URL), and open the Specification history page for the Specification IS81951. |
| http://www.mydomain.com/Integration?Specification=IS81951&Operation=Edit | This URL will go to www.mydomain.com (the DriveWorks Live URL), and open the Specification IS81951 by using the Edit Operation. |
| http://www.mydomain.com/Integration?Run=MyProject&Length=1234&Height=963 | This URL will go to www.mydomain.com (the DriveWorks Live URL), run a new Specification based on the Project name MyProject. And it will pass the values 1234 and 963 to their respective parameters Length and Height. |
| http://www.mydomain.com/Integration?Specification=IS81951&Transition=Submit | This URL will go to www.mydomain.com (the DriveWorks Live URL), and Transition the Specification IS81951 to the Submit Transition.
The Specification must be in a State where it can be Transitioned and Submit must be a valid Transition in the Specification Flow. |
| http://www.mydomain.com/Integration?Specification=IS81951&Length=1234&Height=963 | This URL will go to www.mydomain.com (the DriveWorks Live URL), and pass the values 1234 and 963 to their respective parameters Length and Height in the existing Specification IS81951.
|
Escaping tags
When characters used in the structure of the URL are required as parameters or values to be passed into a Specification, the character must be encoded.
Common characters and their URL-encoding equivalent are listed in the table below:
| ASCII Character | URL-encoding |
|---|
| space | %20 |
| & | %26 |
| ? | %3F |
Example of an Escape Tag in use.
When the value My Company is required to be passed into a Constant named ParameterCompanyName, the URL will look like this:
http://www.mydomain.com/Integration?Run=MyProject&CompanyName=My%20Company
For a complete list of URL Encoding References, please refer to this W3 Schools article.
Editing the Integration Module
The module can have the following settings applied:
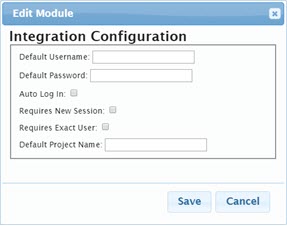
- Default Username - The default Username used to log into the group via the Integration page.
- Default Password - The default Password used to log into the group via the Integration page.
- Auto Log In - Automatically logs the user specified by the settings above into the group. If this isn’t checked then Requires New Session and Requires Exact User will be ignored.
- Requires New Session - Will log any current session out and log in with the details above.
- Requires Exact User - When checked and the current logged in user is different from the user name coming from the URL, a new session will be started. When unchecked the same session will continue to be run.
- Default Project Name - The name of the Project that will be run by default, unless any parameters being passed into it specify a different Project or Specification.
Once the Edit link is clicked the Edit Module dialog will display, where the available settings can be applied:
To access settings for the Integration module:
1. Start Personal Web Edition or DriveWorks Live and Login when the Login page appears in your browser.2. Navigate to the Web page that contains the module to be edited.Default Web Pages
The Web Theme contains the following pages by default. Expand each section to learn more about that page and how it can be modified.
Integration Page
URL: http://localhost:8020/Integration
The Integration page supports integrating DriveWorks Live into external web sites.
Login Page
URL: http://localhost:8020/Login
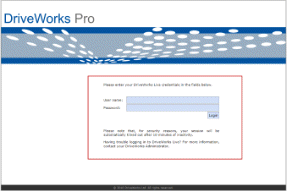
The login page contains the Login Module.
Home Page
URL: http://localhost:8020/
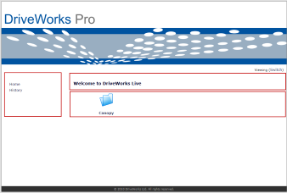
The Home page contains the following modules:
- Menu Module - Positioned in the sidebar
- Markup Control Module - Positioned at the top of the main
content area
- Projects Module - Positioned in the main content area
Specify Page
URL: http://localhost:8020/Apps/ProjectName
Spaces in Projects Names will be replaced with %20
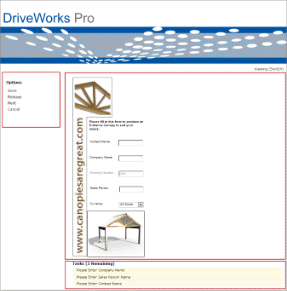
The Specify page contains the following modules:
- Specification Navigation module - Positioned in the
sidebar
- Specification Form Module - Positioned in the main content
area
- Specification Tasks Module - Positioned at the bottom of the
main content area
History Page
URL: http://localhost:8020/History
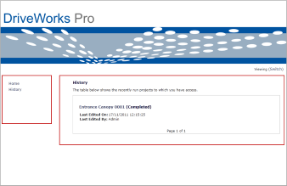
The History page contains the following modules:
- Menu module - Positioned in the sidebar
- Specification History Module - Positioned in the main content
area
History (Specification) Page
URL: http://localhost:8020/History/Specification Name
At least one Specification must exist in the Group to access this page
Spaces in Specification Names will be replaced with %20
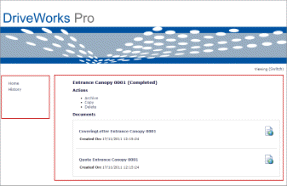
The History (Specification) page contains the following modules:
- Menu module - Positioned in the sidebar
- Specification Details Module - Positioned in the main content
area
Logout URL
Typing bye in the address bar of the current URL will force a log out from the DriveWorks Live session.
Example
| Current URL | URL to logout |
|---|
| http://www.MyDriveWorksLiveURL/ | http://www.MyDriveWorksLiveURL/bye |
| http://www.MyDriveWorksLiveURL/Apps/MyProject/ | http://www.MyDriveWorksLiveURL/Apps/MyProject/bye |
Switch to Editing Mode:
- Click the edit mode link on the required page.
Depending on the Theme being used this could be displayed as one of the following:

or

- The page will now be displayed in Editing mode and will display
the available boundaries in which modules can sit
Edit Module
Once in Editing mode on the web page that contains the module
click the Edit link in the top right corner of the module.

An inline frame is used to display a web page within a web page.
DriveWorks Live sites can be displayed within an inline frame on a website by using the <iframe> tag.
See HTML Iframes for more information.



 Image showing a Constant prefixed with the string Parameter in DriveWorks Administrator.
 Image showing a Form Control prefixed with the string Parameter in DriveWorks Administrator.


